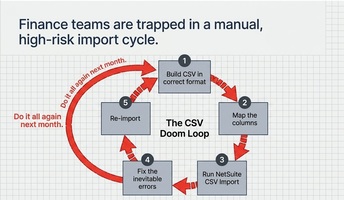
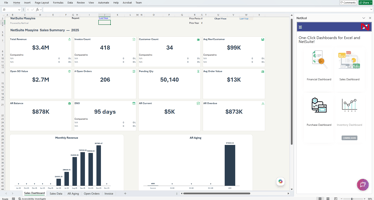
Most teams run their business on two systems at once: a system of record like NetSuite or HubSpot,...
One of the biggest limitations of standard NetSuite CSV imports is partial receiving. If you receive against a purchase order in stages, which almost every warehouse does, the CSV Import Assistant cannot handle it cleanly, so you end up entering receipts manually, line by line, inside NetSuite.
Legacy Excel add-ons try to solve this, but they require downloading separate purchase order sheets, building VLOOKUP formulas and toggling technical flags like ReplaceAll = FALSE. NetXcel by Maayins removes that complexity with direct, line-level receiving control straight from your spreadsheet. Below is the complete workflow, including a real purchase order received in two stages, with serial and lot tracking handled inline.
In this guide:
- Key takeaways
- Watch the walkthrough
- Why is partial receiving hard with CSV import?
- Setting up the receipt template
- How to create and upload item receipts
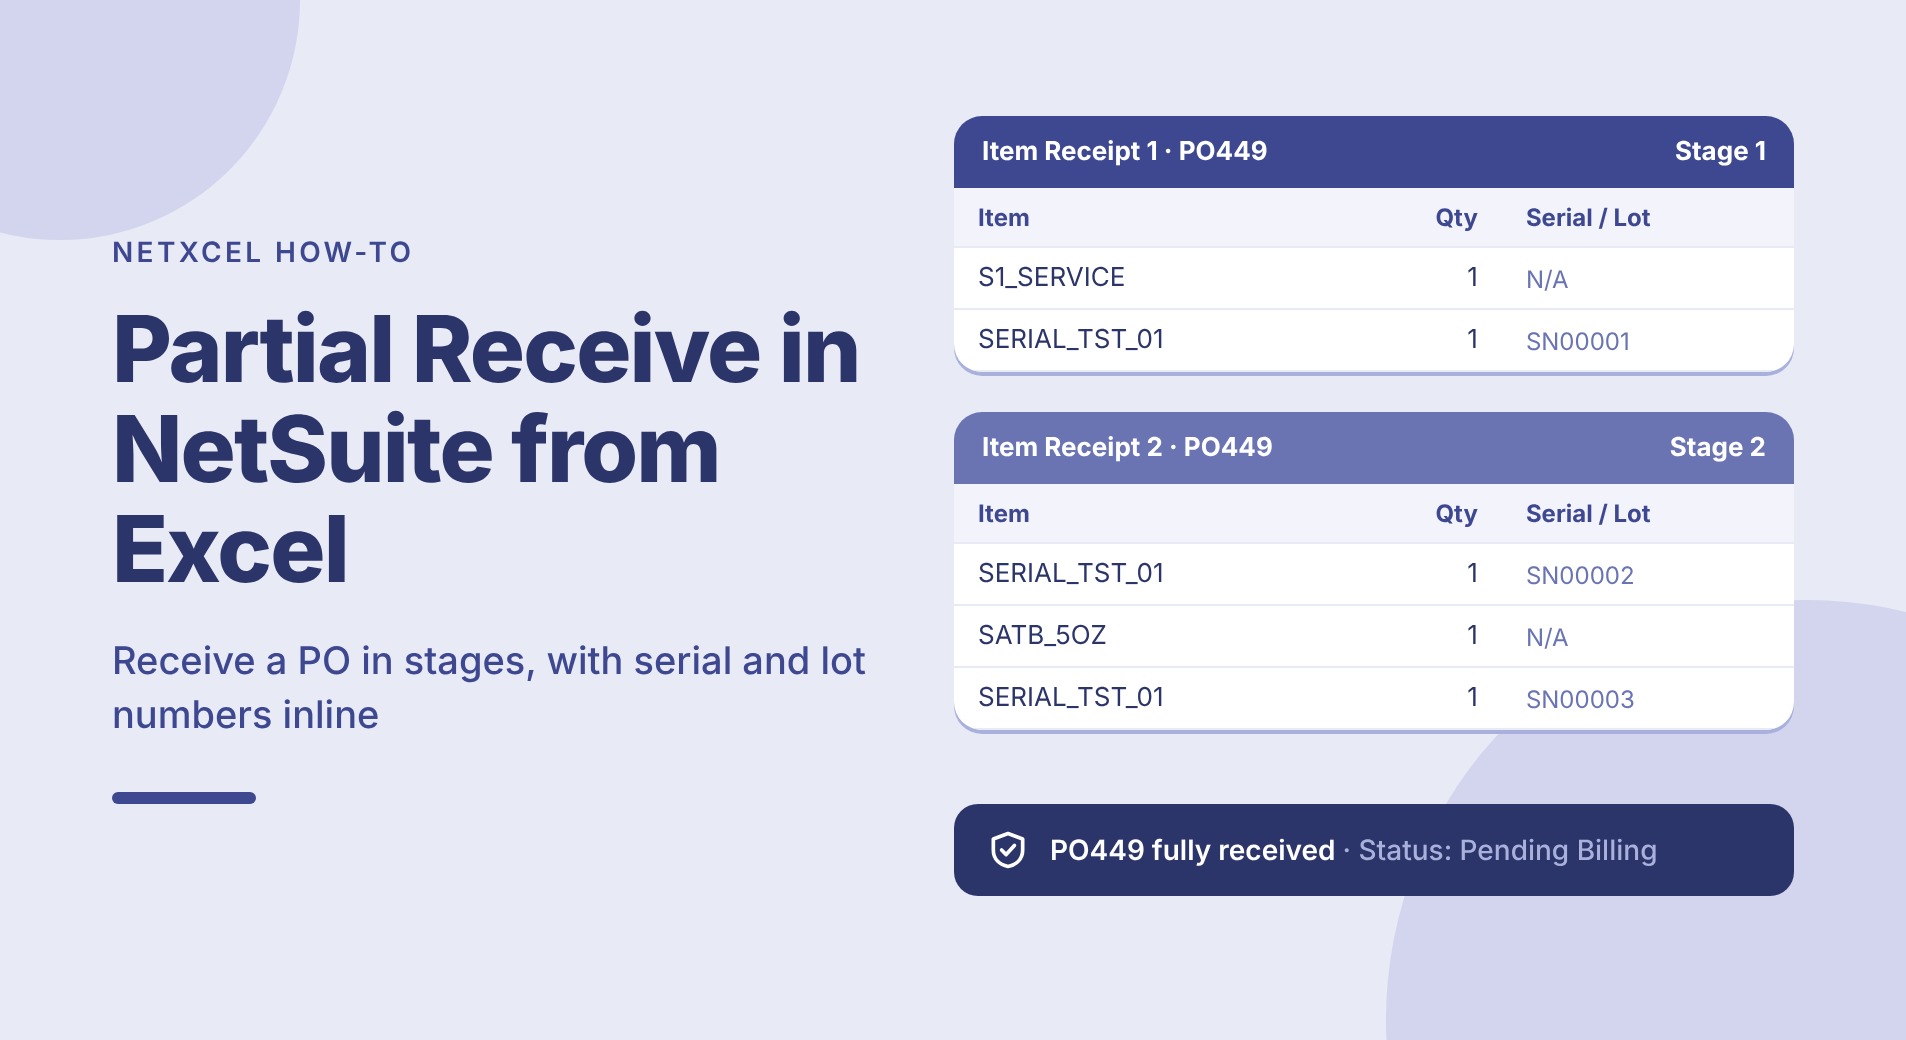
- A real example: PO449 in two stages
- Confirming the record in NetSuite
- NetXcel vs manual entry and legacy add-ons
- Tips for clean partial receipts
- FAQ
Key Takeaways: Partial Receiving in NetSuite from Excel
- Most warehouses receive purchase orders in stages, which standard CSV imports do not handle cleanly.
- With NetXcel, entering the PO in Created From auto-fills the receipt header from NetSuite.
- You enter partial quantities per line and assign serial or lot numbers inline, on the same row.
- Rows that share an External ID are grouped into one item receipt.
- After upload, the new item receipt internal ID comes back to the sheet and the PO status updates in NetSuite.
Watch the Walkthrough
Watch: How to process partial item receipts in NetSuite using NetXcel
Why Is Partial Receiving Hard with CSV Import?
An item receipt has to be created from a specific purchase order, and each line has to reference the right PO line, the right quantity and, for tracked items, the right inventory detail. A partial receipt adds more moving parts:
- Remaining quantities change. After the first receipt, you need to know what is still open on each line.
- Mixed item types. Service items, standard inventory and serial or lot controlled items each need different fields.
- Inventory detail. Serial and lot numbers sit in a subrecord that is awkward to express in a flat CSV file.
- Grouping. Several rows must land on one receipt, not create several receipts.
The result is that many teams give up on importing and key receipts by hand in NetSuite, which is slow and error prone when receiving is high volume.
Setting Up the Receipt Template
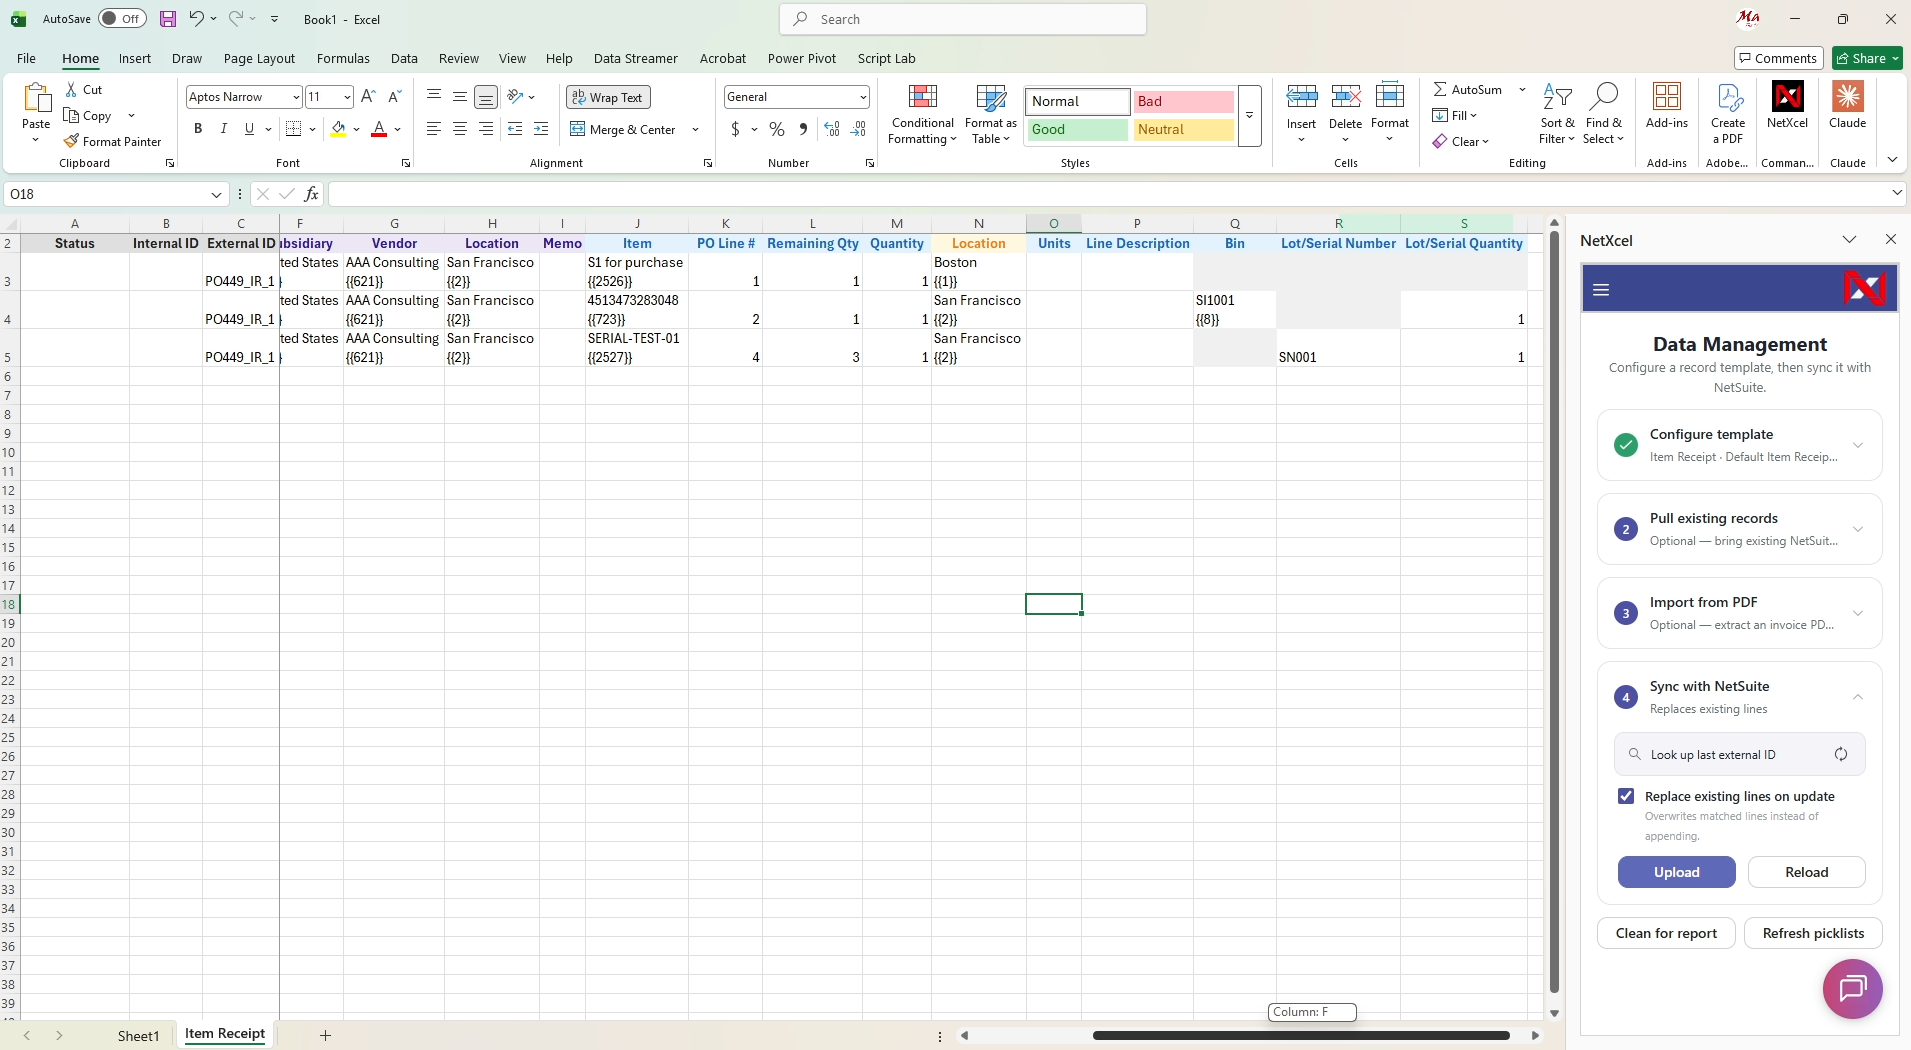
Open the side menu and go to Data Source, then Data Management. Choose your data source, select Item Receipt as the record type, pick your template and click Add Template (or Update Template) to pull it into the sheet.
Every picklist field loads live from NetSuite, so you can select values from dropdown menus or type and tab without memorizing internal IDs.
How to Create and Upload Item Receipts, Step by Step
- Pull open purchase orders. Query open PO numbers into Excel using NetXcel saved searches or SuiteQL to see the quantities remaining on each line.
- Enter partial quantities and serial numbers. Set Created From to the PO (for example
PO449), which auto-fills the header. Enter the partial quantity for each line, attach any serial or lot numbers from the picklist, and put the same External ID on every row you want grouped into one receipt. - Upload to NetSuite. Click Upload in the NetXcel side panel. NetXcel creates the item receipt in NetSuite, links it to the original PO and returns the new item receipt internal ID to your sheet.
Still keying partial receipts by hand? See NetXcel receive a purchase order in stages from your own spreadsheet. Book a demo
A Real Example: PO449 Received in Two Stages
Here is a typical partial receipt where only part of a purchase order has arrived. PO449 mixes item types that standard CSV imports usually cannot handle in one pass, and it is received across two separate item receipts.
| PO449 line | Control type | Ordered qty | Stage 1 receipt | Stage 2 receipt |
|---|---|---|---|---|
| S1_SERVICE | Service (no inventory detail) | 1 | 1 | N/A |
| SERIAL_TST_01 (Serial Test 01) | Lot / serial controlled | 3 | 1 (SN00001) | 2 (SN00002, SN00003) |
| SATB_5OZ | Standard inventory | 1 | 0 | 1 |
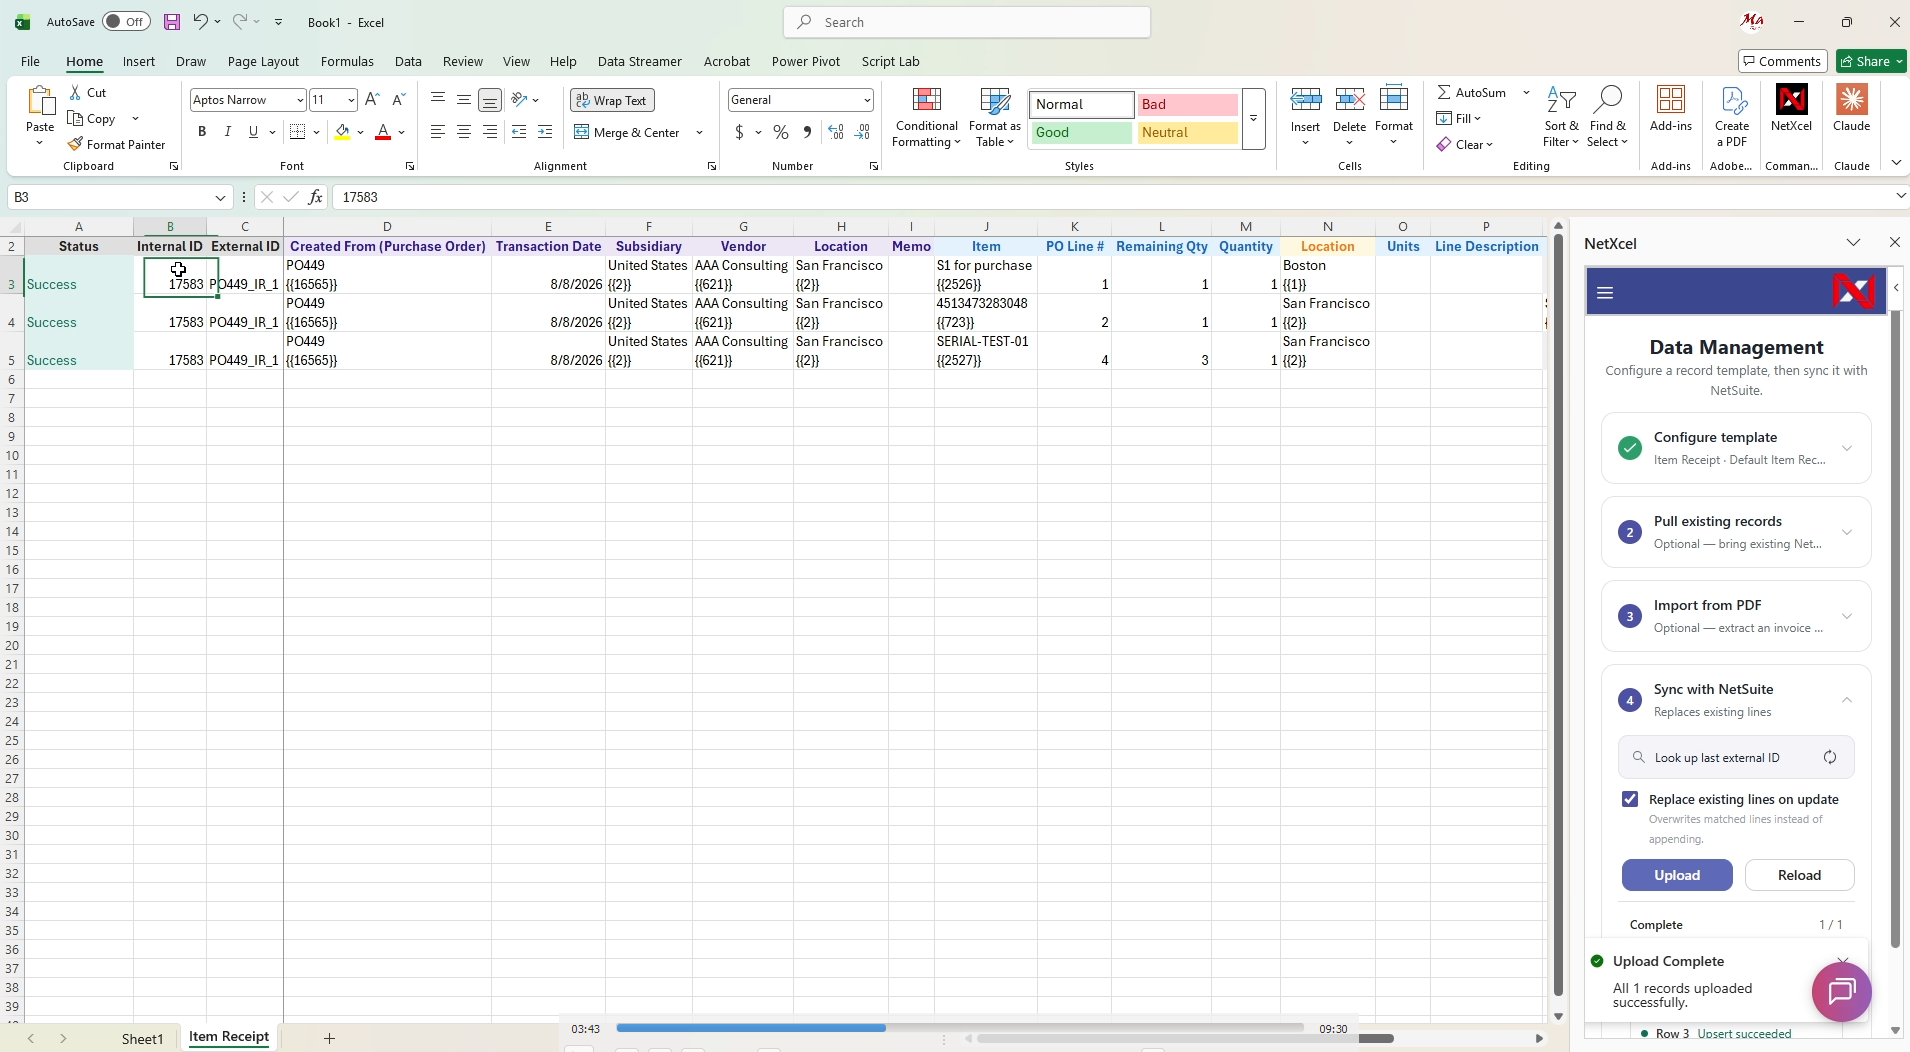
Stage 1: The First Partial
Stage 1 receives the service item S1_SERVICE, which needs only quantity and location, and one unit of the serial controlled item Serial Test 01, where you assign serial SN00001 with a quantity of 1 for a deliberate partial receipt. SATB_5OZ has not arrived yet, so it is left for later.
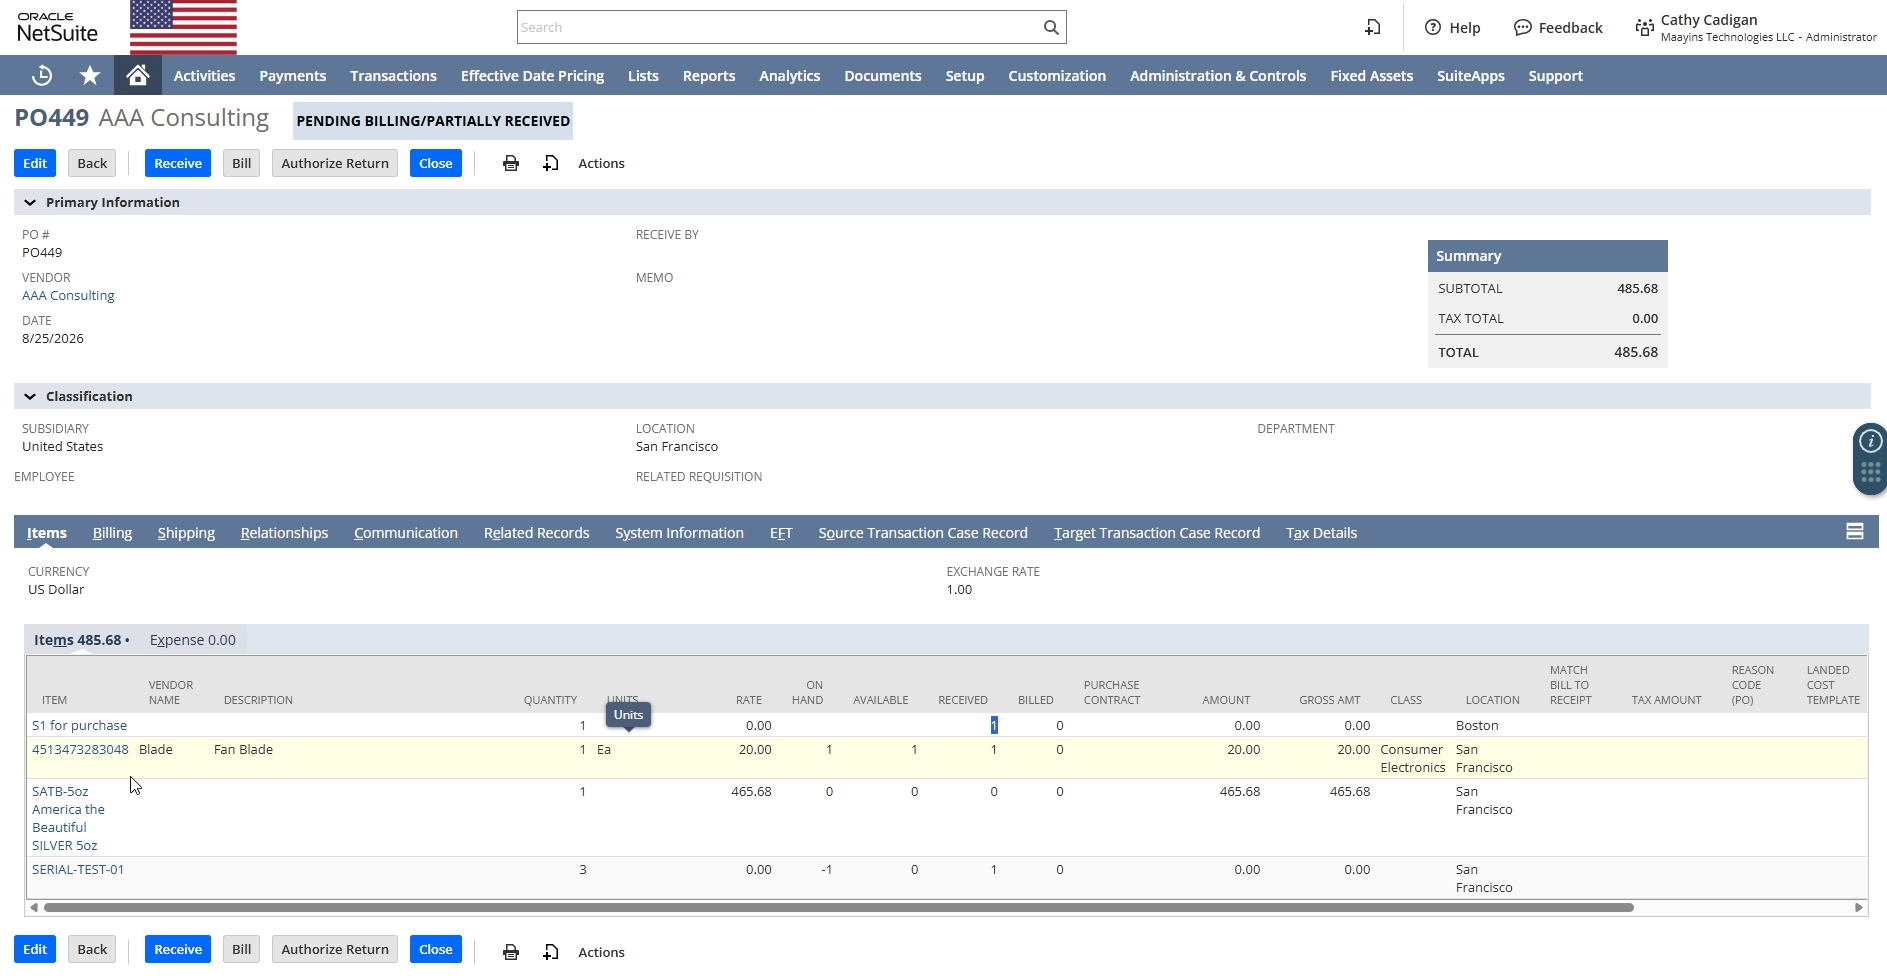
Fill in the same External ID across every row to group them into one receipt, then click Upload. Within seconds the status turns green and internal IDs populate in the sheet. Refreshing PO449 in NetSuite moves the status from Pending Receipt to Pending Billing/Partially Received, and opening the new item receipt confirms every detail matches.
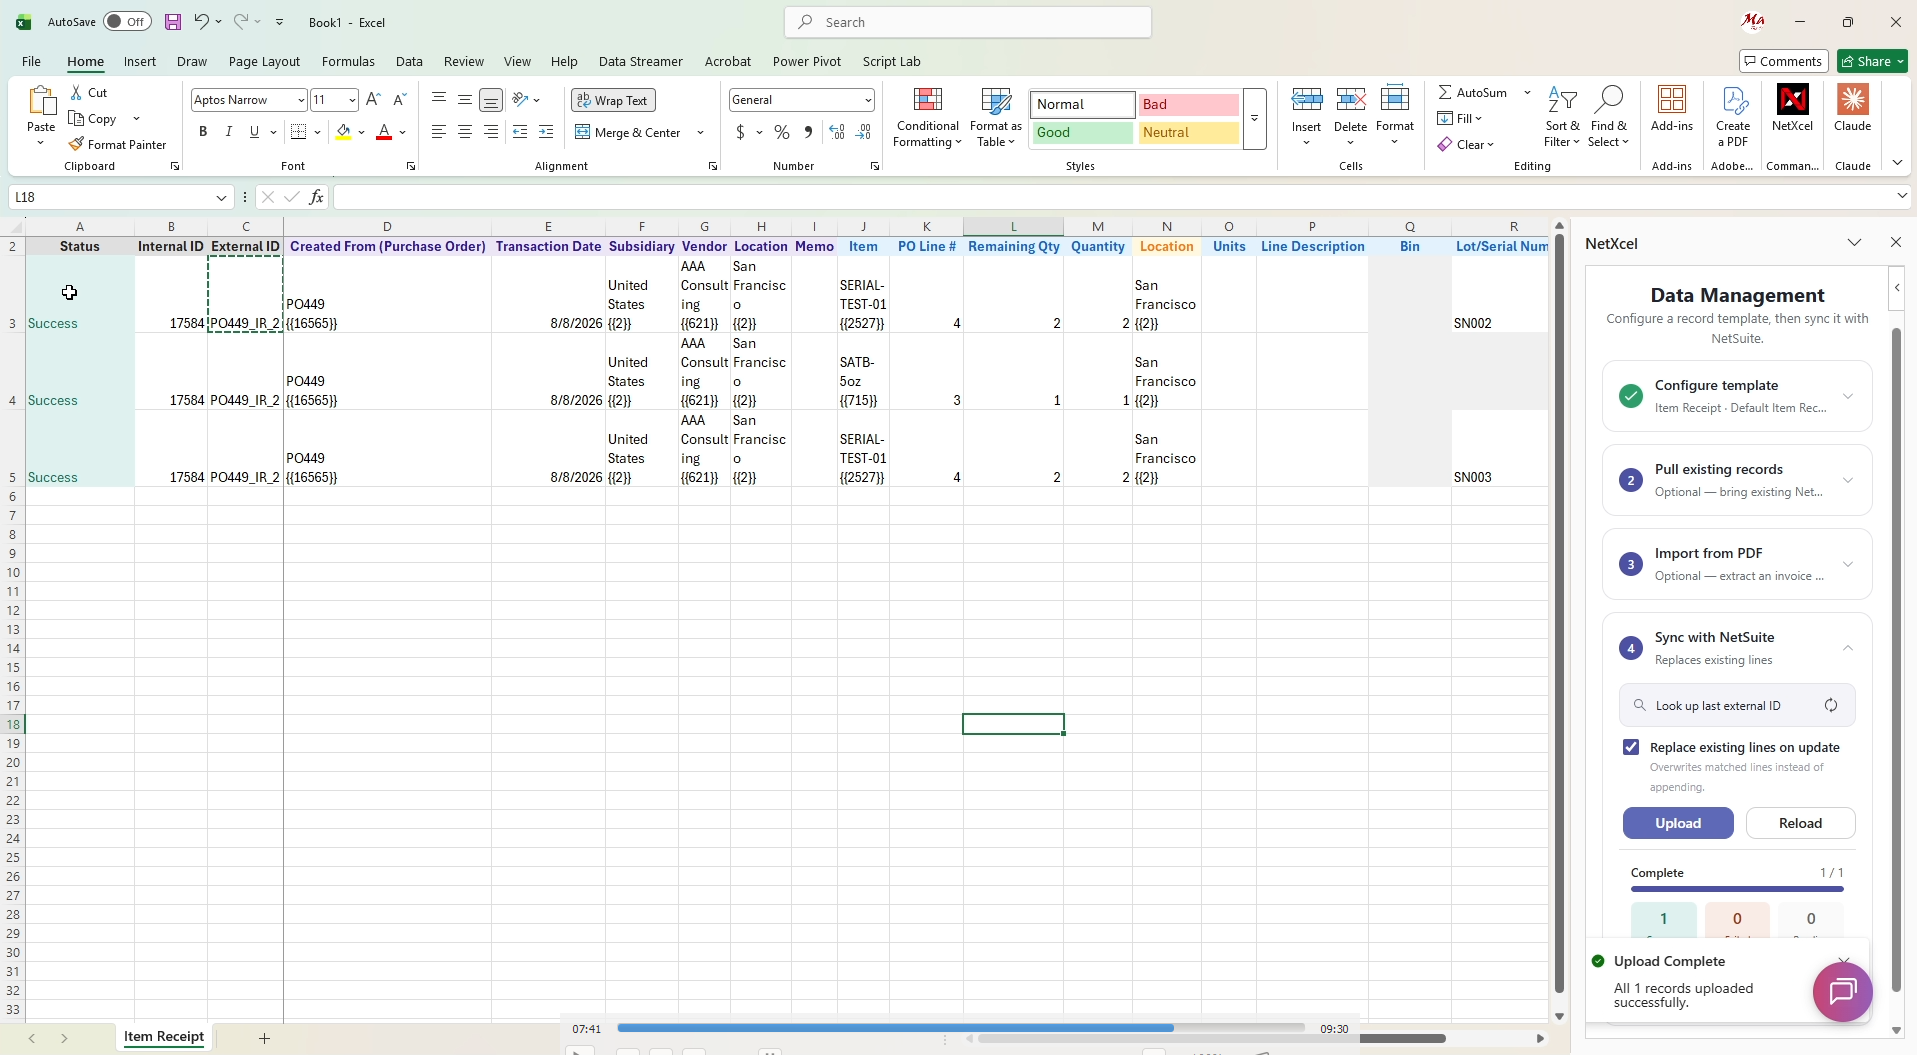
Stage 2: Finishing the Order
For the rest of the order, clear the sheet, redownload the template and enter the PO number and date. This time the remaining serial units are split across separate rows for full line-level flexibility:
- Serial number
SN00002for Serial Test 01 on the first row. - Standard inventory item SATB 5 oz on the second row.
- Serial number
SN00003for Serial Test 01 on the third row.
Copy the External ID down across all rows and click Upload. PO449 is now fully received with a status of Pending Billing, and the new item receipt confirms both SN00002 and SN00003 were logged accurately on separate lines.
Confirming the Record in NetSuite
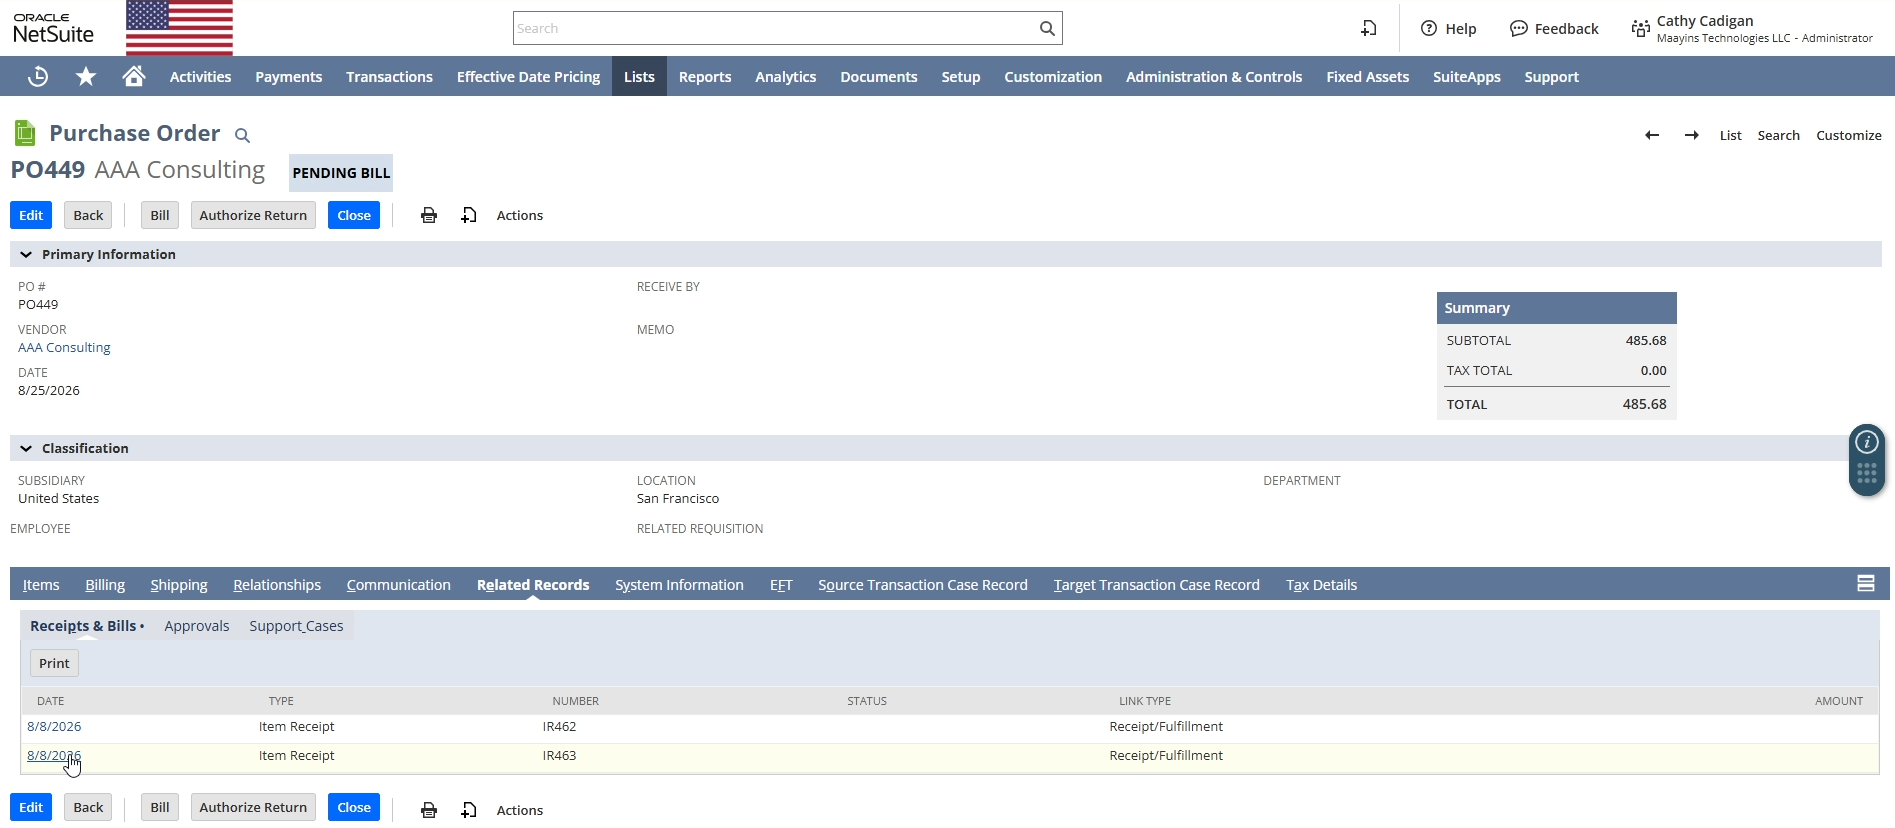
Open NetSuite and check purchase order PO449. The status updates automatically to Pending Billing/Partially Received after Stage 1 and to Pending Billing after Stage 2, with received quantities and serial numbers logged accurately on the transaction record.
NetXcel vs Manual Entry and Legacy Add-ons
| Capability | Standard NetSuite CSV | Legacy Excel add-ons | NetXcel by Maayins |
|---|---|---|---|
| Partial receiving | Not handled cleanly | Manual formula mapping required | Built-in PO reference auto-fill |
| PO header population | Manual entry | Manual lookup formulas | Automatic when you enter the PO |
| Multi-line serial and lot tracking | Complex or unsupported | Multiple tab setups | Inline on each row |
| Live NetSuite picklists | None (requires exact names or internal IDs) | Static or periodic refresh | Live picklist dropdowns |
NetXcel also works in both directions. Warehouse and finance teams can pull open PO lines into the sheet, track what remains and post multi-stage receipts from a single spreadsheet, with no manual CSV formatting. For any team that receives POs in stages, it turns a manual, time-consuming task into a simple spreadsheet upload.
Tips for Clean Partial Receipts
- Pull open lines first. Start each receiving session from a fresh saved search or SuiteQL query so you work from current remaining quantities.
- Use one External ID per receipt. A clear pattern such as the PO number plus a stage number makes grouping obvious and easy to audit.
- One serial per row for serialized items. Splitting serial numbers across rows, as in Stage 2, keeps each unit easy to trace.
- Check the PO status after upload. Pending Billing/Partially Received confirms the partial landed; Pending Billing confirms the order is fully received.
- Keep the sheet. With the internal IDs written back, it becomes a record of what was received and when.
Frequently Asked Questions
Can I partially receive a NetSuite purchase order from Excel?
Yes. With NetXcel you set Created From to the purchase order, enter the quantity received on each line and upload. NetXcel creates the item receipt in NetSuite and links it to the PO.
Can I assign serial and lot numbers in the spreadsheet?
Yes. Serial and lot numbers are selected from a live NetSuite picklist and entered inline on each row, so there is no separate inventory detail sheet.
How do several rows become one item receipt?
Give every row that belongs to the same receipt the same External ID. NetXcel groups those rows into a single item receipt when you upload.
What happens to the purchase order status?
NetSuite updates it automatically. After a partial receipt the PO shows Pending Billing/Partially Received, and once every line is received it shows Pending Billing.
Do I need to know NetSuite internal IDs?
No. Picklist fields load live from NetSuite, so you can select values from a dropdown or type and tab.
Does NetXcel work in Google Sheets?
Yes. NetXcel is available for Excel on Microsoft AppSource and for Google Sheets on the Google Workspace Marketplace.
Receive Purchase Orders from Your Spreadsheet
NetXcel connects Excel and Google Sheets to NetSuite so your warehouse and finance teams can receive POs in stages, with serial and lot numbers, without CSV files. Need help with your receiving process or inventory setup? Our team also offers NetSuite implementation services and ongoing managed services.
NetXcel is a multi-platform spreadsheet connector for Excel and Google Sheets developed by Maayins. It is available on Microsoft AppSource and the Google Workspace Marketplace. NetSuite is a registered trademark of Oracle. NetXcel is an independent solution and is not affiliated with or endorsed by Oracle.